MPI4Py on ADA
MPI4Py is a python package that uses Message Passing Interface (MPI). MPI is used for multi-node communication for parallel calculations in HPC.
Using SLURM to ask for more resources does not automatically gaurantee parallel features, as the data still needs to passed between processors, for which MPI is essential.
Why use MPI?
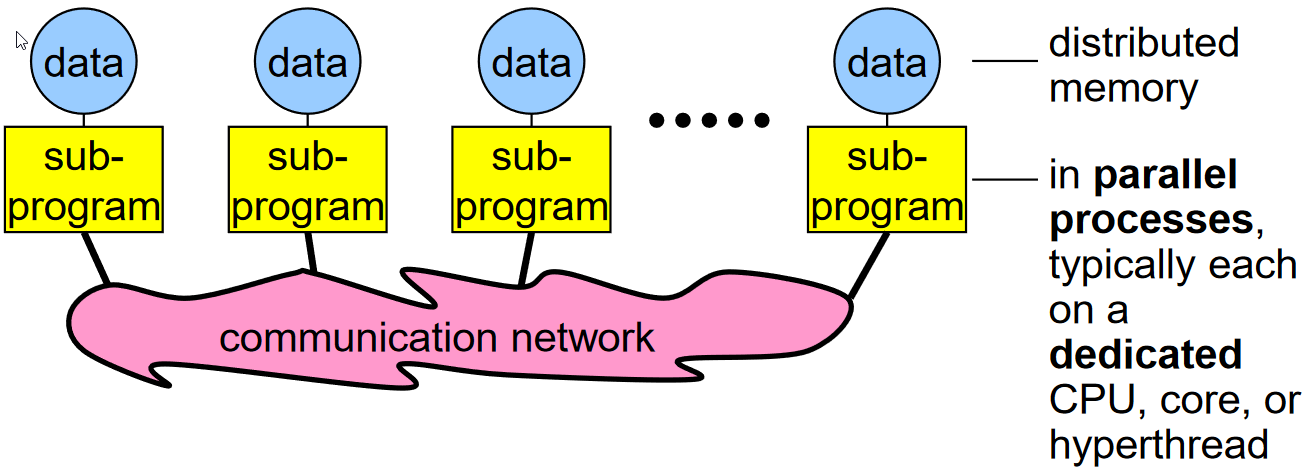
Image reference from Rolf Rabenseifner’s course on MPI.
A sequential approach to programming involves data from memory being transferred to a process in a processor. While an MPI approach as shown in figure above, can do the same, but in parallel, by “distributing” the memory to parallel processes for various computations.
Quickstart
The following set of commands set up the conda environment required to run MPI using the MPI4Py package on ADA. On the login node on ADA, the following steps create an mpi4py environment which will be used to submit jobs on the compute nodes.
Load Anaconda
module load anaconda-uoneasy/x.xLoad gcc as this is required to compile the files.
module load gccCreate a new conda environment.
conda create --name mpi4pytestNote that this environment will be created with the default version of python from the available modules. This can be checked with
python --version. If a different python version is desired--python=3.X.Xby replacing X with the specific version number. This flag can then be added aftermpi4pytestabove. For examplesconda create --name mpi4pytest --python=3.11.2Activate the created environment.
source activate mpi4pytestInstall the mpi4py library to the conda environment.
conda install -c conda-forge mpi4py mpichInstall any other libraries that you may need with your mpi4py work.
Conda install numpyA sanity check can be performed to see if the MPI4Py installation has been successful.
mpiexec -n 12 python -m mpi4py.bench helloworld
This should give you the following result, indicating 12 threads were used.
All the above has been indicated below together.
conda create --name mpi4pytest --python=3.11.2
source activate mpi4pytest
conda install -c conda-forge mpi4py mpich -y
conda install numpy -y
mpiexec -n 12 python -m mpi4py.bench helloworld
Chapters
The following examples are discussed in this documentation. These examples can be copied to your \home directory using the command copy_mpi4py_examples.
Submitting a job to ADA
#!/bin/bash

#SBATCH --partition = defq
#SBATCH --nodes = 1
#SBATCH --ntasks-per-node = 12
#SBATCH --mem=2g ##Change this if job requires higher memory.
#SBATCH --time = 1:00:00


moudle load anaconda-uoneasy/
module load openmpi/gcc/4.1.6

source activate mpi4pytest ## this conda environment name should the same as what was created.

mpirun -np $SLURM_NTASKS python <pyfilename.py>
The above will run the code on the value assigned to --ntasks-per-node number of processors.
Save the above file (say run.slurm) and type the following command in from the same directory where you have the python file pyfilename.py.
sbatch run.slurm
The submitted job can be tracked with
squeue -lu <user_id>
Important
An elaborate deep dive for MPI4py is available here. This documentation however, gives basic examples for MPI concepts on ADA, but is also heavily inspired from the course above.